Step-by-Step Instructions:
Step 1:
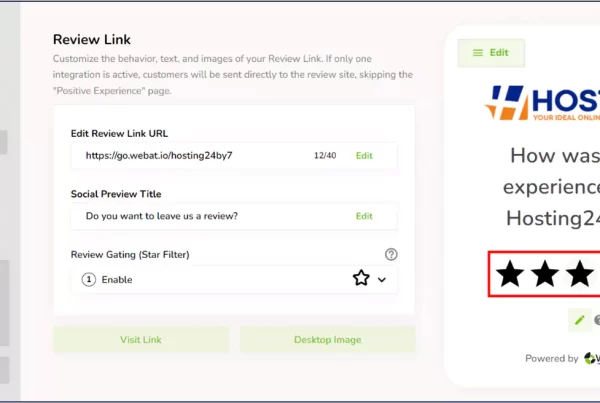
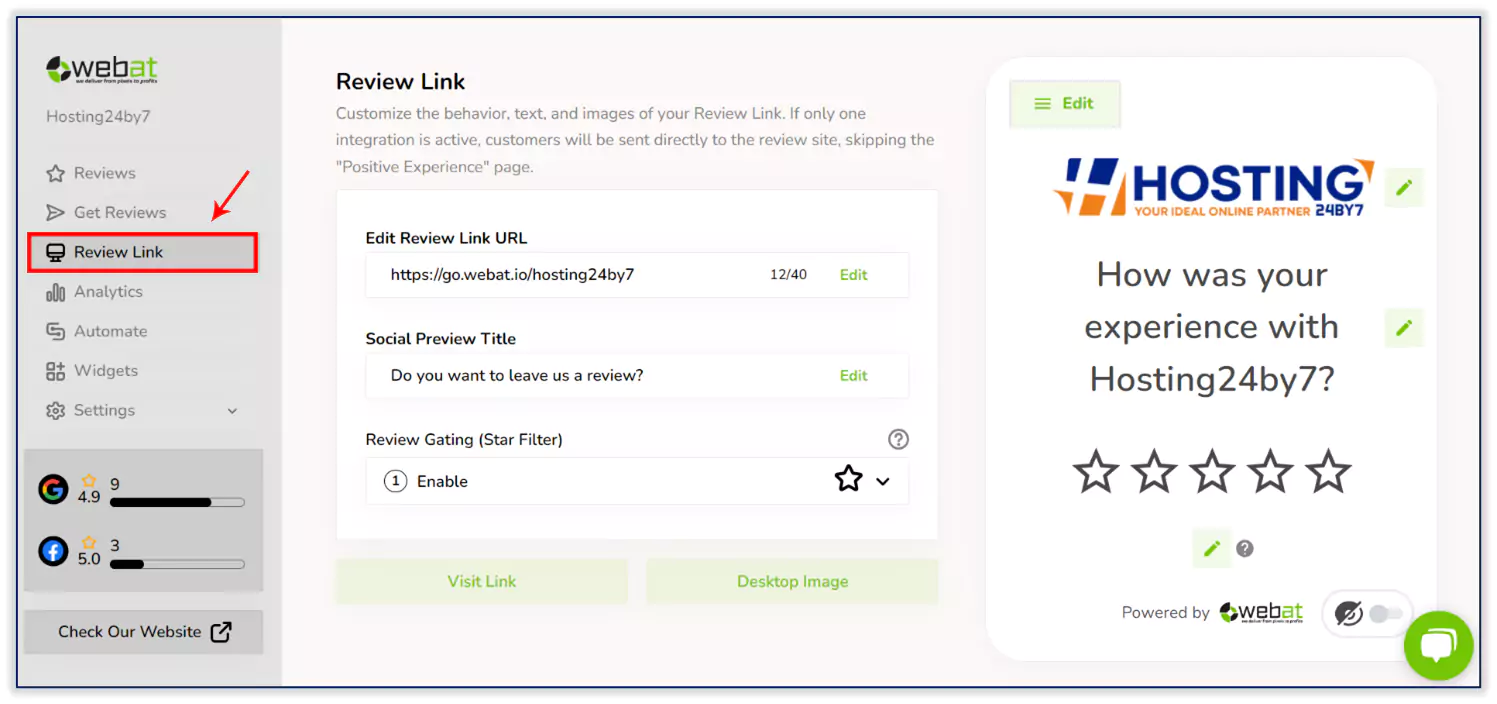
- click the “Review Link” option on the dashboard.
Step 2:
- Edit and change your link URL as per your business name.
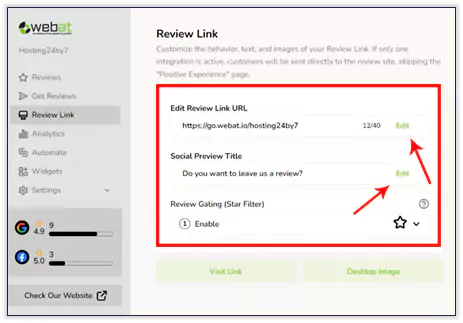
- You can change the link preview title.
Step 3:
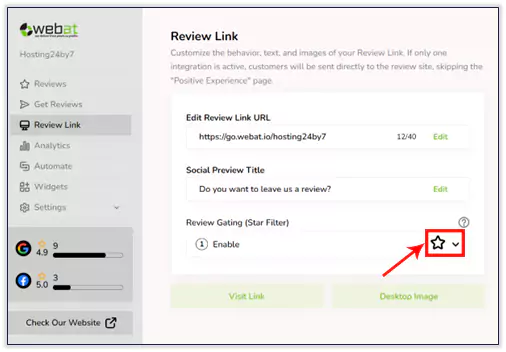
- You can customize your review gating star filter to collect reviews by simply enabling it.
Step 4:
- Click the “Desktop Image” button to customize the image on your landing page.

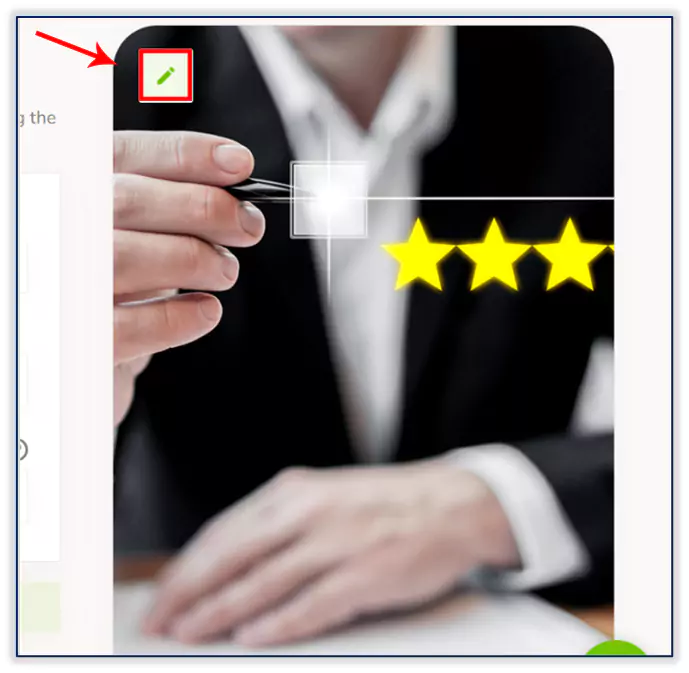
- You can customize your desktop image on your landing page.
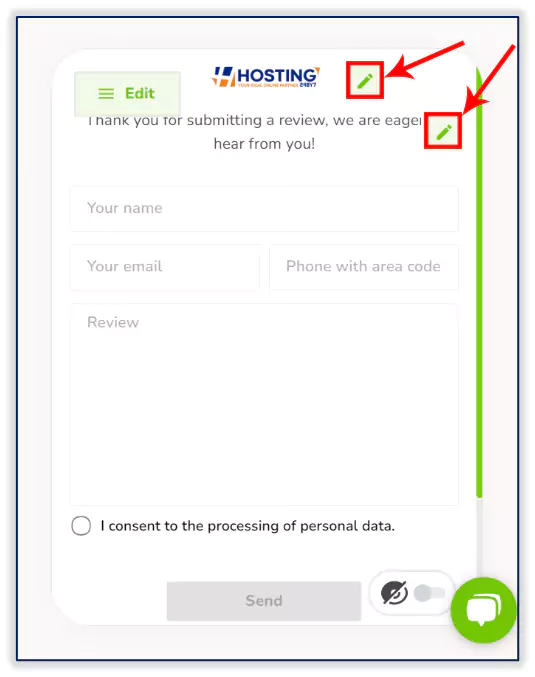
Step 5:
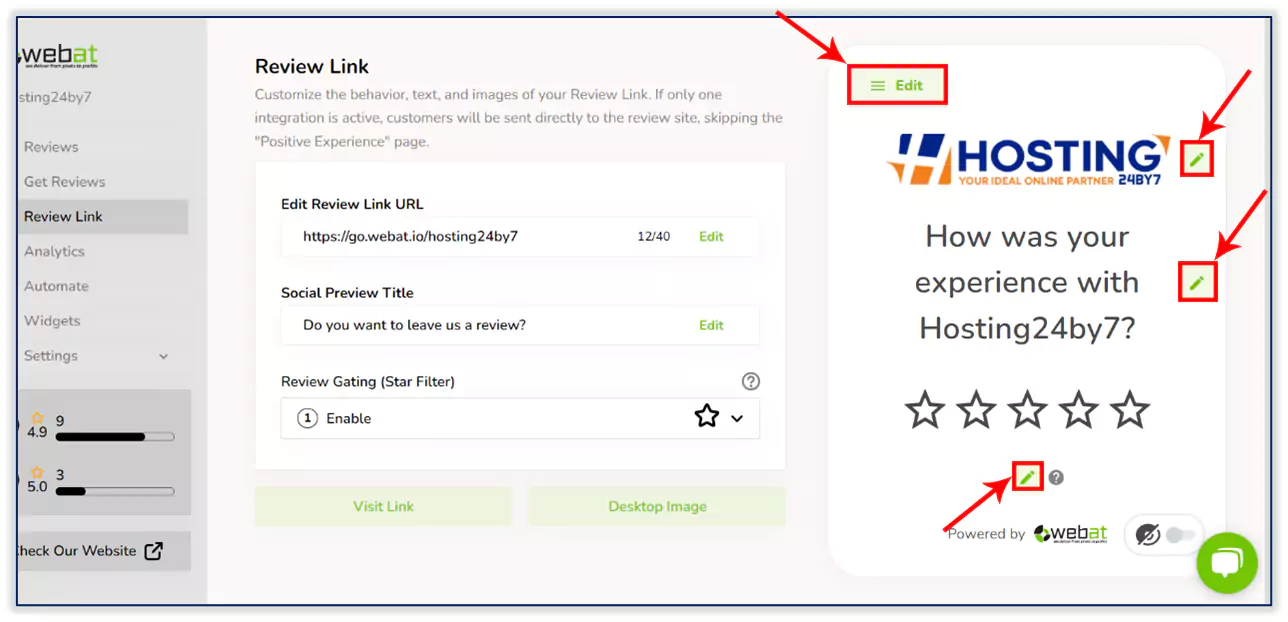
- You can change the logo.
- You can change the question.
- Set the threshold for 3 or 4 stars where the private feedback form should be shown
Example: If you set it to 3 stars when a customer chooses 3 stars or below, the private feedback form will appear, collect the review, and send it to your personal email. It will not be shown on the public review platform.
When a customer chooses 4 stars or above, the review will be displayed on the public platforms you have added to the Webat Reviews Tool.
Step 6:
- click the “Positive Experience” option on the section.
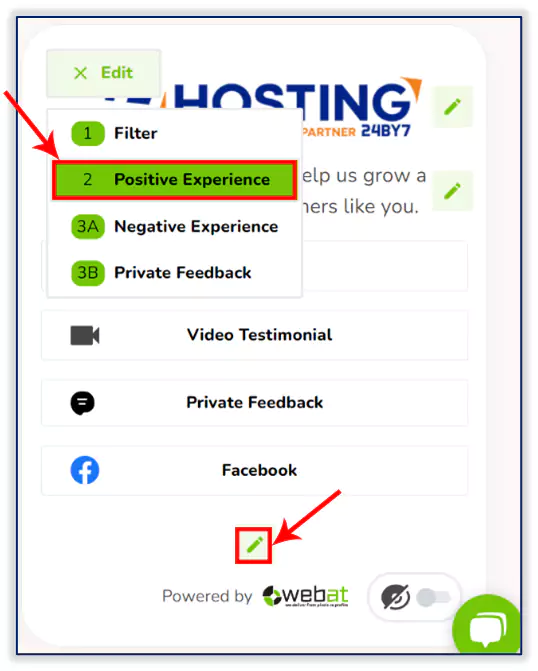
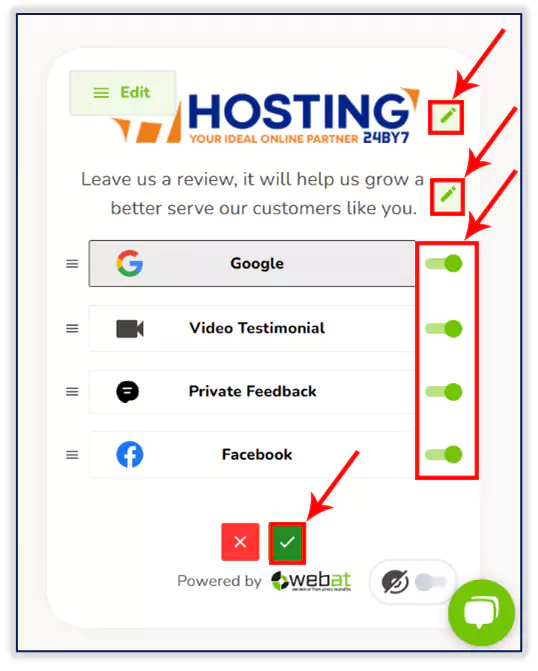
- You can customize your logo and content text, and add the platform where you want to collect reviews by simply enabling it.
Step 7:
- click the “Negative Experience” option on the section.
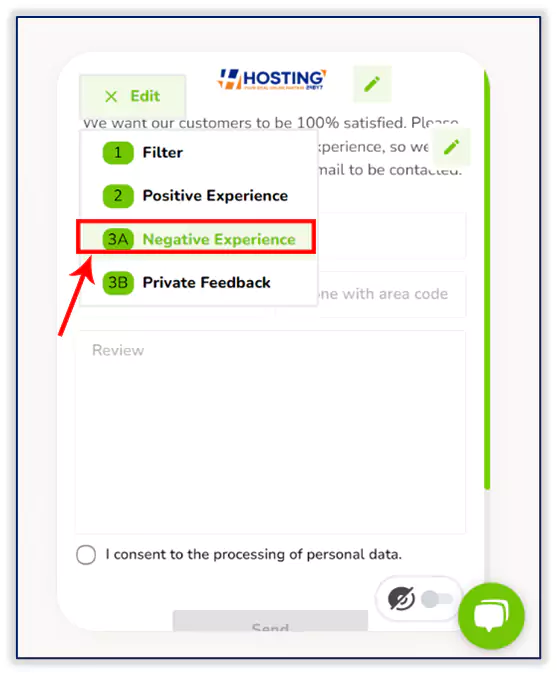
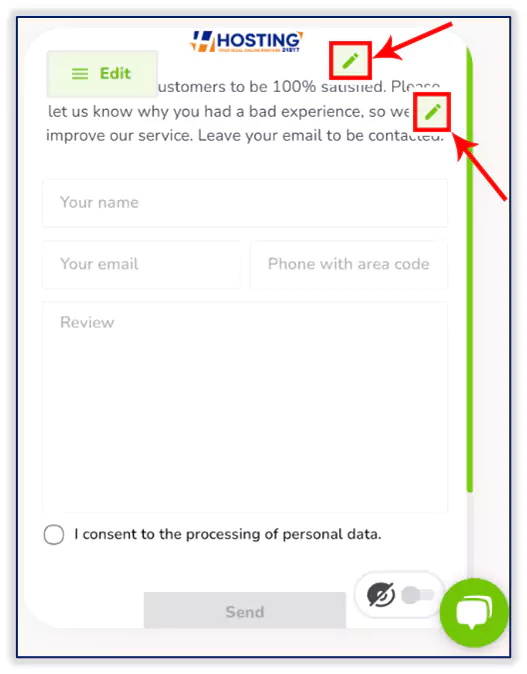
- You can customize your logo and content text of your negative experience section.
Step 8:
- click the “Private Feedback” option on the section.